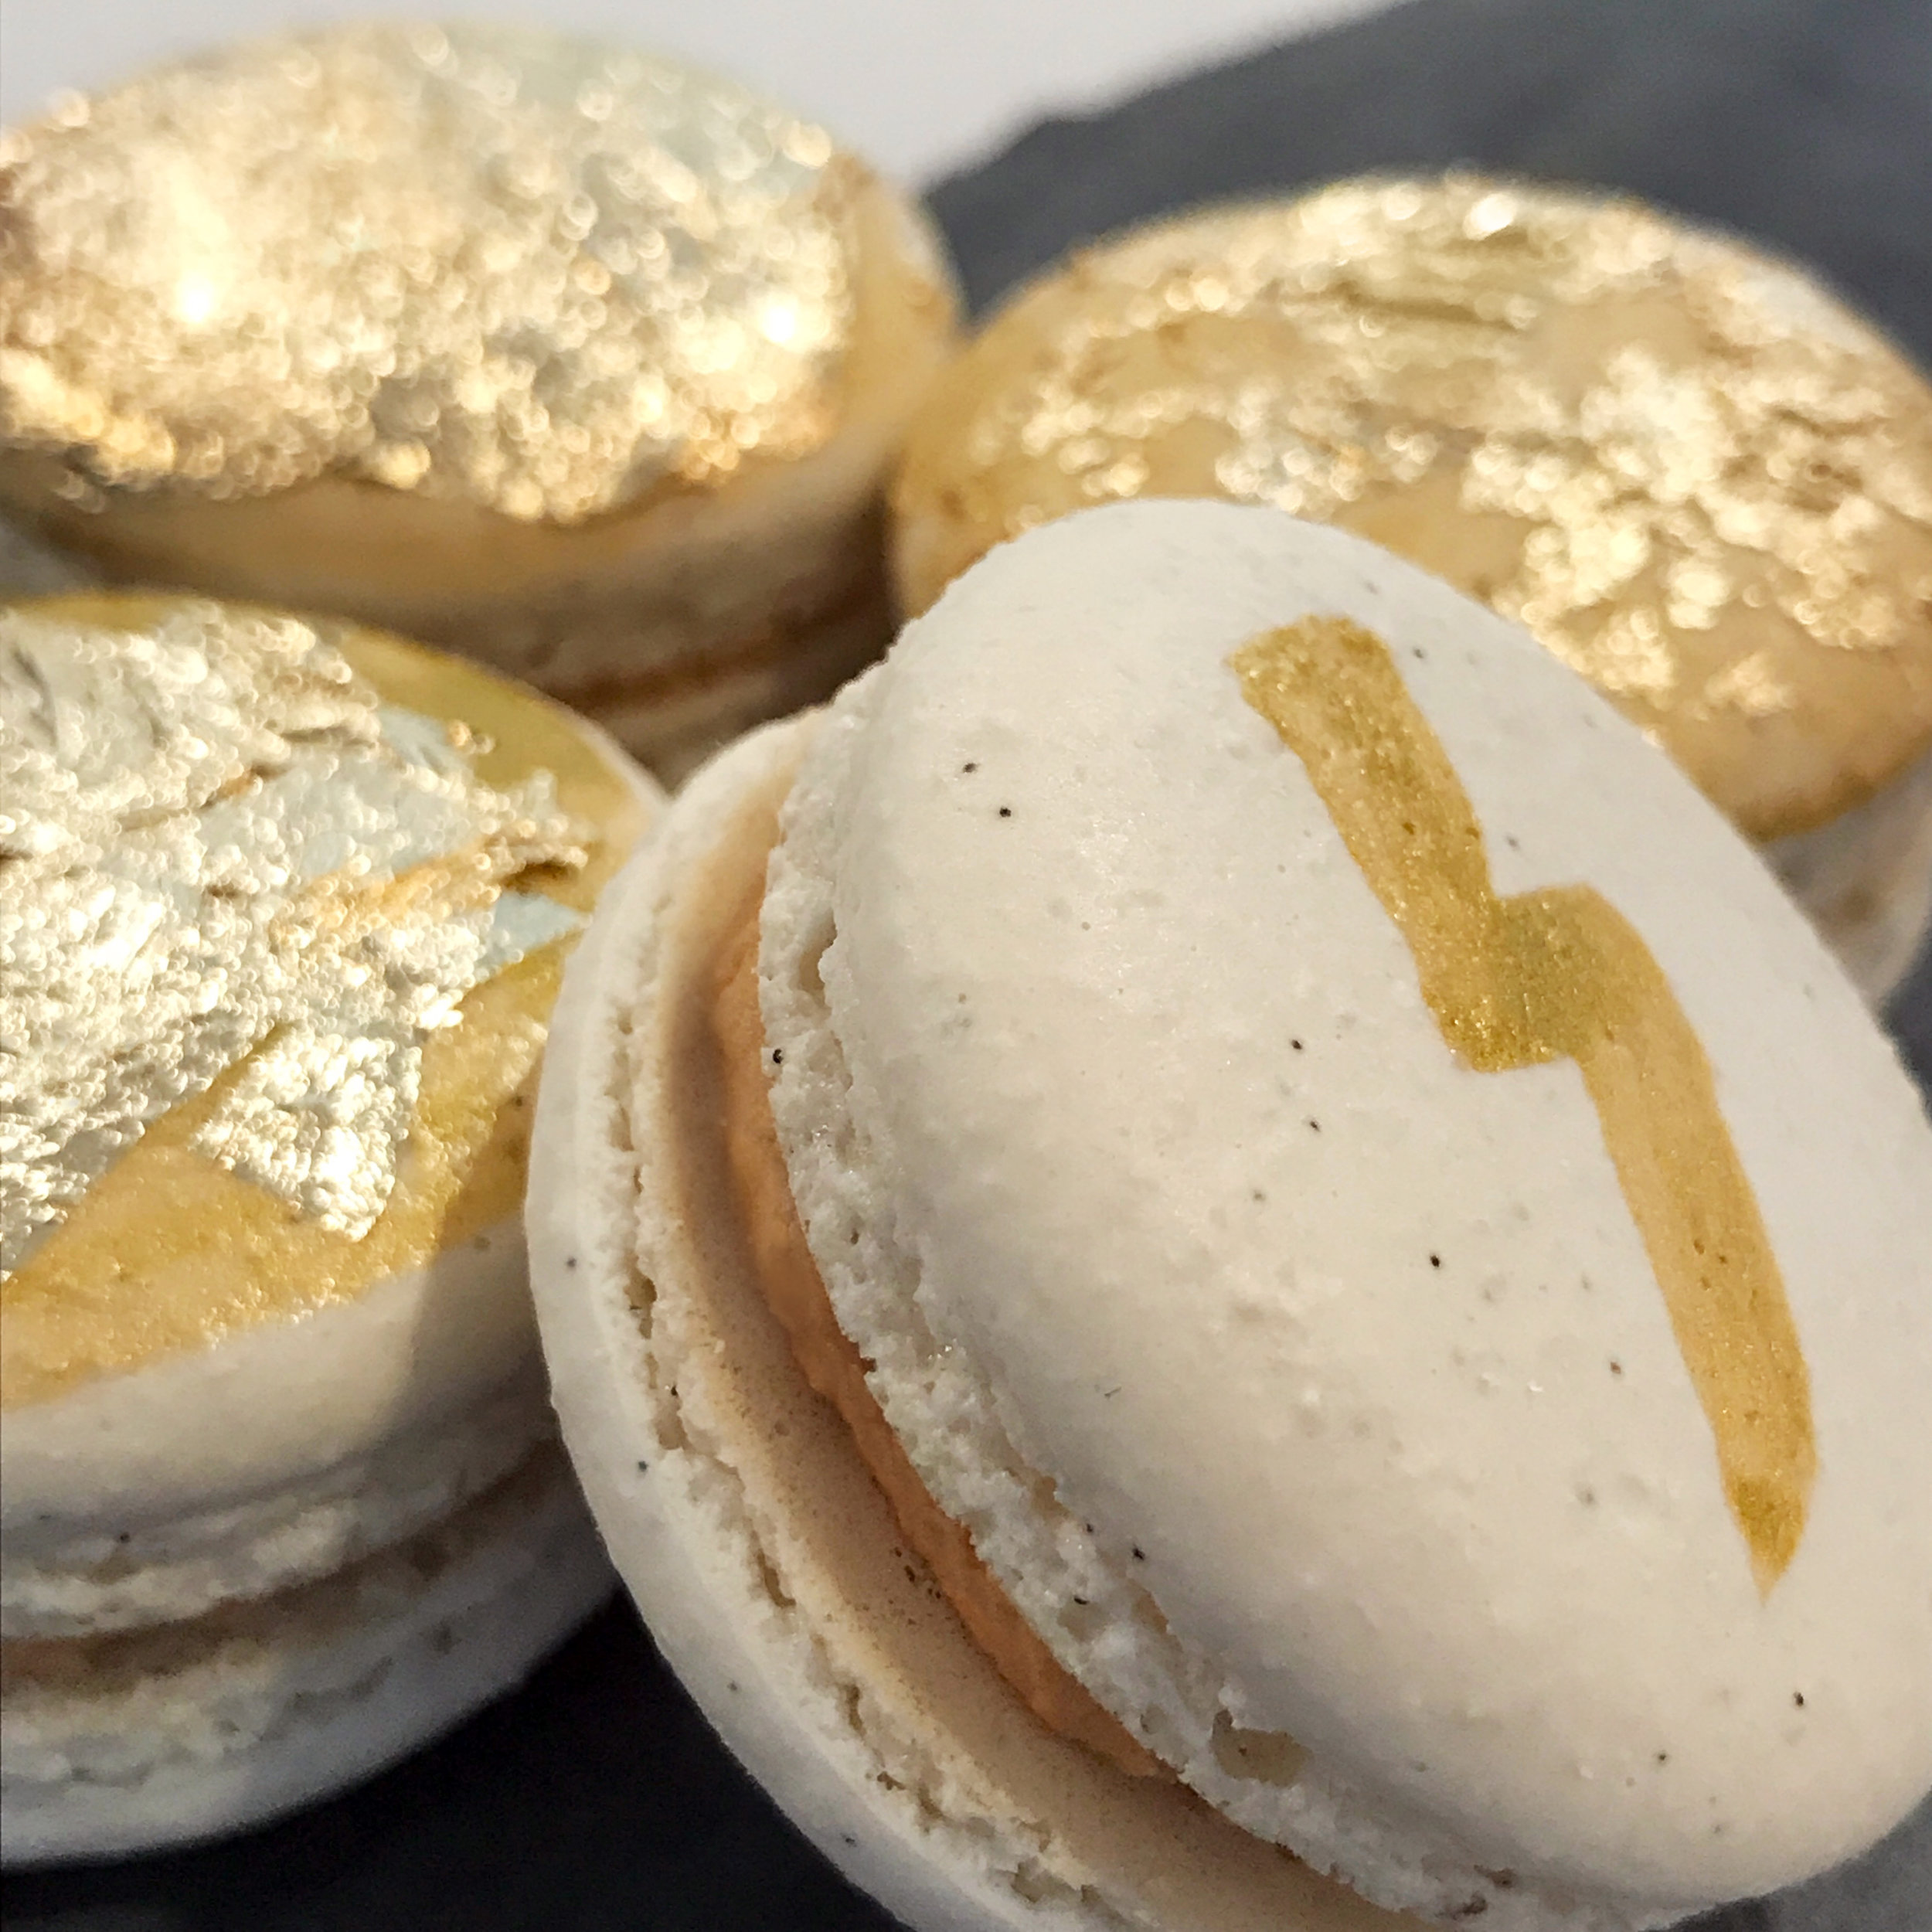

week 14. vanilla bean macs x butterscotch buttercream (butterbeer)
using my base recipe, I subbed out cocoa powder for the equivalent amount of almond flour and then flavored with the pulp of 1 vanilla bean.
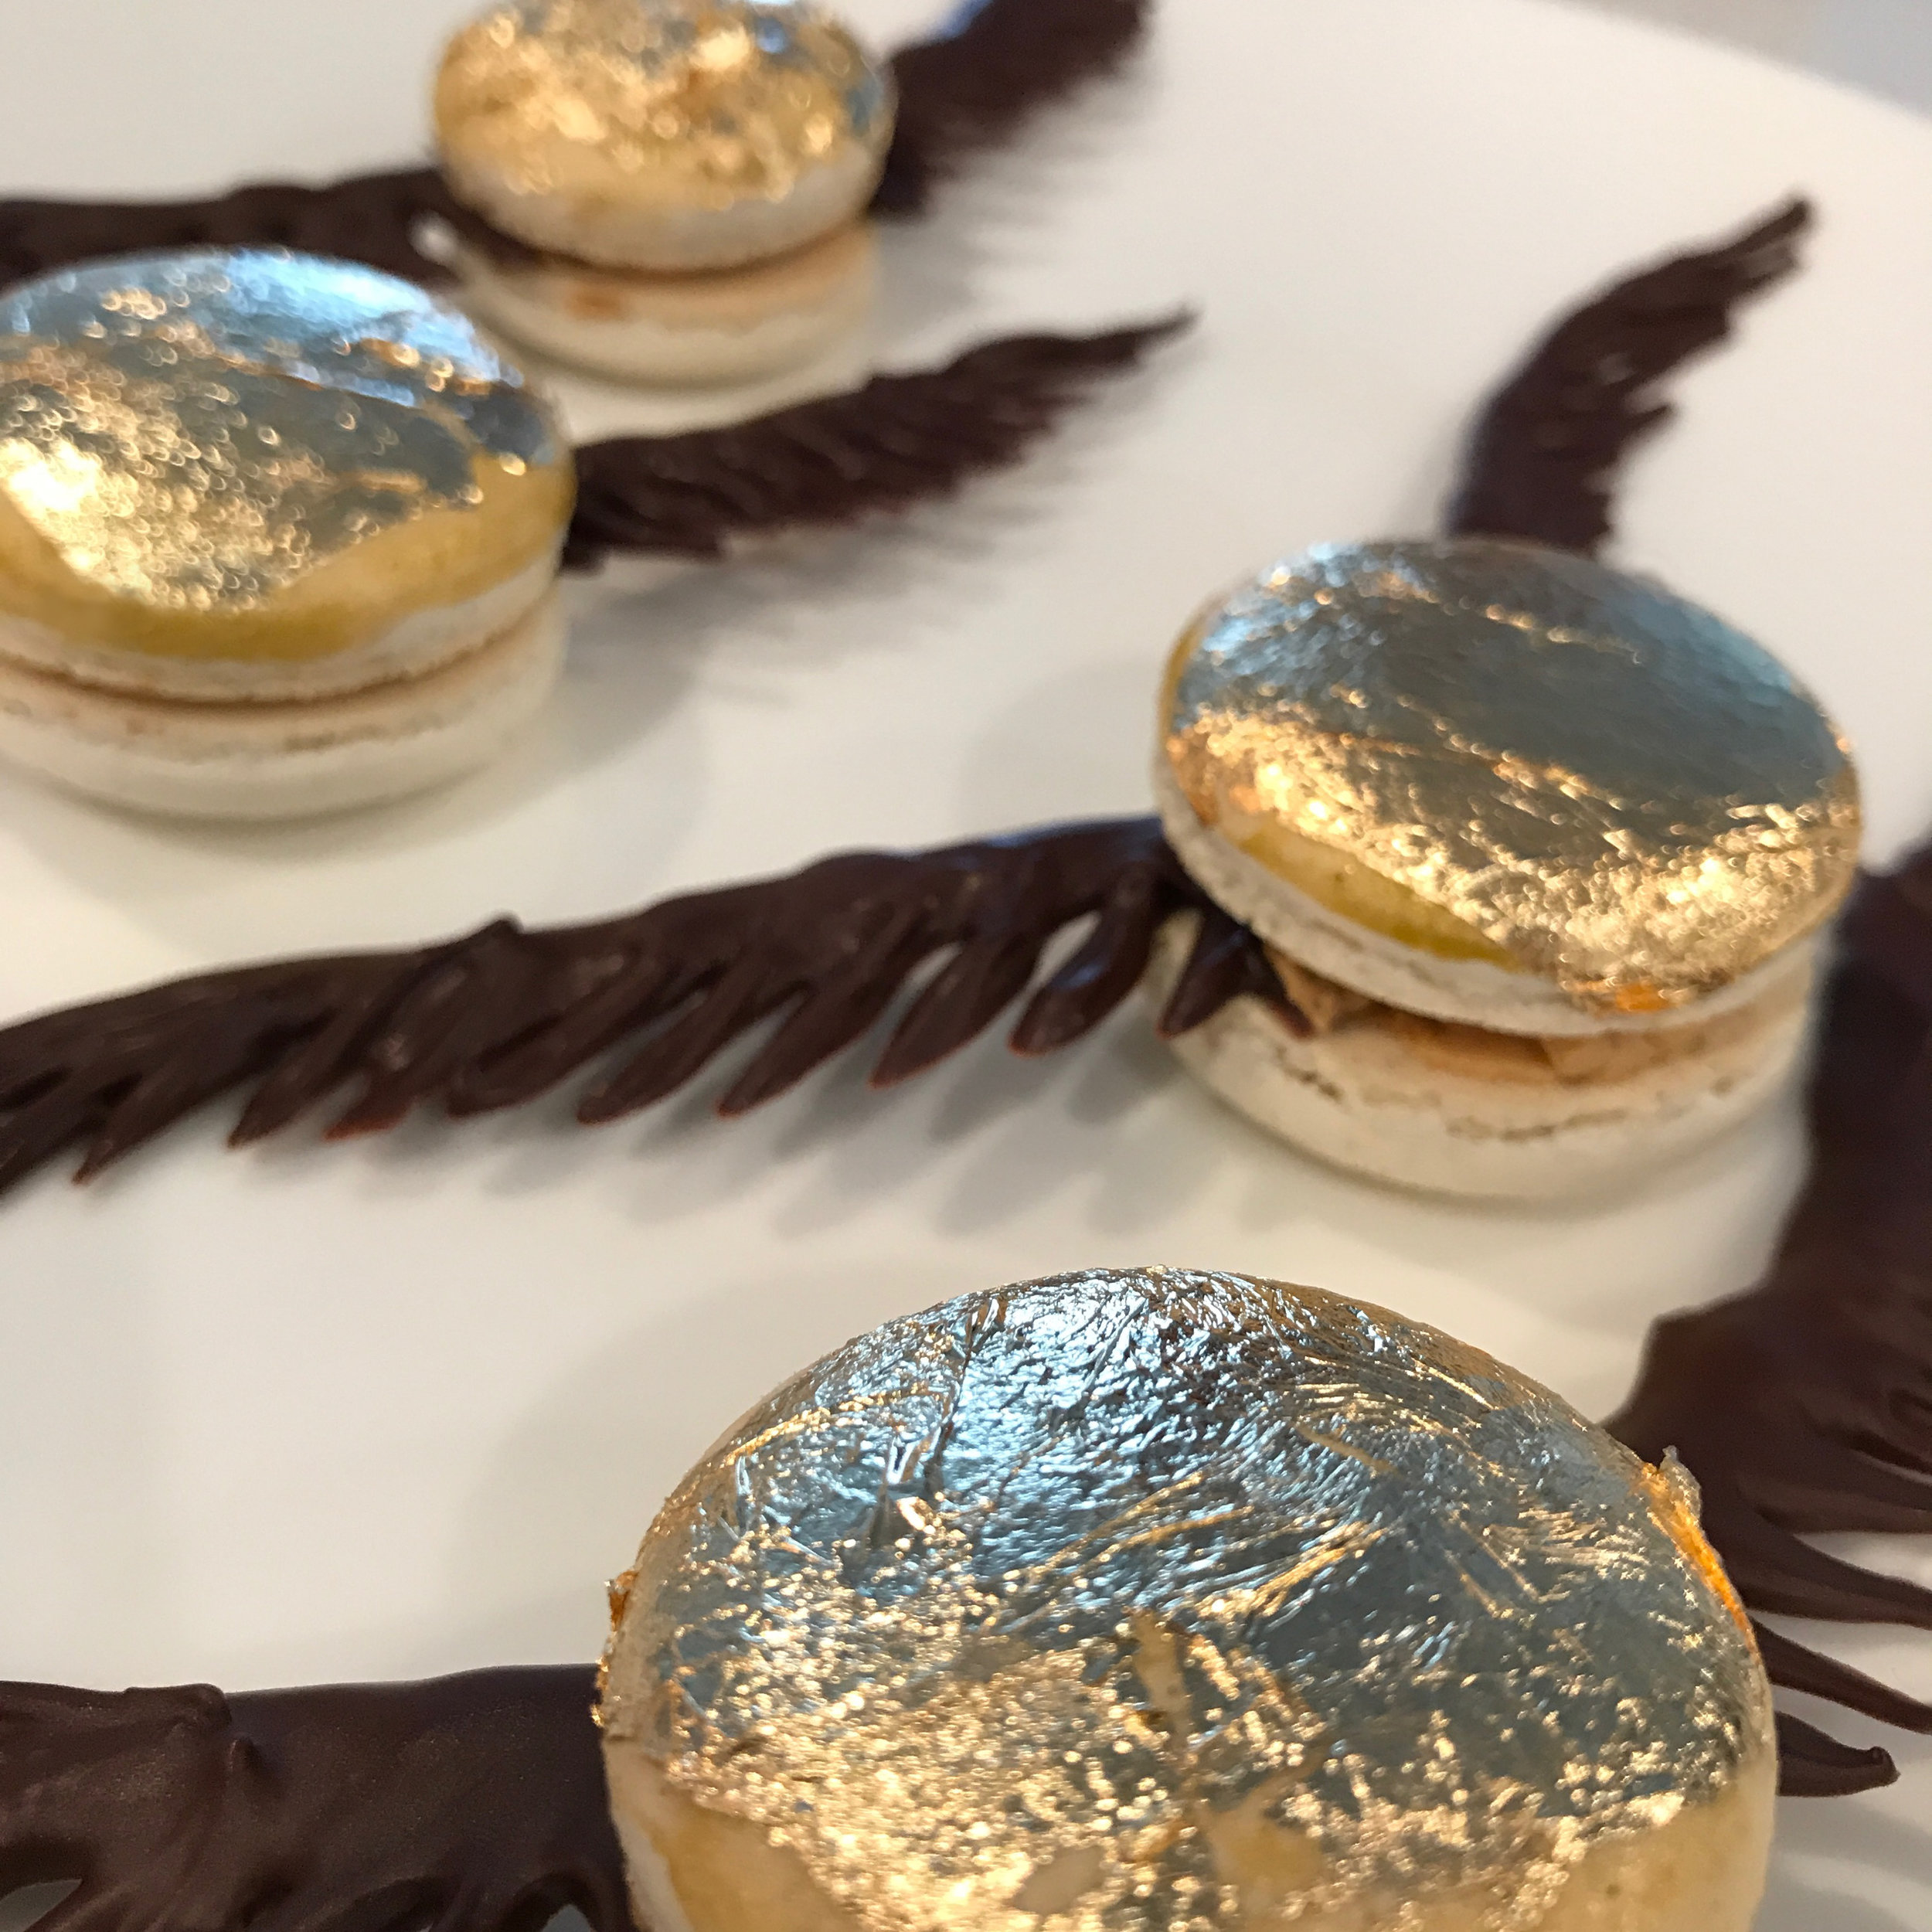
my friend taylor and I get together every couple months to bake. we're also both obsessed with harry potter, so it was an obvious choice to have her over to make butterbeer-flavored, golden snitch macs. (by the way, check out taylor's website; she's a crazy-talented sculptor).
we definitely nailed the flavors on this batch. the chocolate snitch's wings that taylor made looked amazing (mine turned out to look like weird eyebrows, but it's fine), and we had fun playing around with edible gold leaf. the edible paint I was able to get at a moment's notice wasn't the greatest color gold, but in combination with the gold leaf, we think these turned out really playful and fun. also, harry potter.
ingredients | shells
mixture a:
almond flour 37g
vanilla bean pulp from 1 bean
almond TPT* 300g
powdered sugar 38g
egg whites 73g
mixture b:
egg whites 73g
salt 0.5g
water 50g
sugar 188g
light corn syrup 10g
* TPT means equal parts powdered sugar and another ingredient, in this case it’s almond flour, and you will use 150g of each to equal the 300g.
method | shells
bring all ingredients to room temperature.
from “mixture a,” sift together the vanilla, almond flour, almond TPT, and powdered sugar into a large bowl and set aside. (it’s important to sift to make sure everything is very fine).
from “mixture b” whisk the egg whites and salt in a standing mixer with the whisk attachment set to 4 and leave it there while you make a syrup.
make a syrup from “mixture b.” first add the water, then the sugar, then the corn syrup into a small saucepan. pour the sugar in very slowly so that it all gets incorporated into the water, being very careful not to get any on the sides of the saucepan or your syrup can crystallize. do not stir!! stirring can also cause crystallization. just let it do its thing.
heat this syrup on medium until it boils and reaches 248°F. really, don’t stir it!
tip: you can take the chill off the eggs if you hold the bowl over the heating saucepan for a few seconds while swirling it around or whisking it (I like to whisk).
turn up the standing mixer to 8 to create soft peaks while the syrup is still heating up to the right temperature.
to create the meringue, slowly pour the hot syrup along the side of the bowl into the mixing egg whites and let it mix until it’s stiff, but still shiny.
take the egg whites from “mixture a,” plus a spatula full of the meringue and mix it into the sifted almond, powdered sugar mixture that you made earlier. fold this together with a spatula until you form a thick paste.
fold the rest of the meringue into that paste until it becomes glossy and slightly runny. (you’ll know when it’s done when the batter slowly falls off your spatula like a thick ribbon and settles into itself in the bowl after a few seconds. you don’t want it to be any runnier than that because you don’t want the mixture to spread once it’s piped).
scoop batter into a pastry bag fitted with about a 10mm piping tip, and pipe quarter sized bulbs onto parchment paper or a silicone baking mat on a sheet pan.
tip: if a little nub from where you released the piping bag doesn’t settle into itself, you can use a small paintbrush to tap it down.
tap the bottom of the pan a couple times to prevent any air bubbles while baking. (i actually tap it like 30 times because it's fun and it really does get the air bubbles out)
let your macs sit out for at least 10 minutes before going in the oven. this recipe uses the italian method, and I've read that you really don't have to do this unless you're using the french method. but ever since my successful, crack-less shells from week 10, I will continue to incorporate this step.
bake on your oven’s convection setting at 280° for 15 minutes. for the first 5 minutes with the oven door closed, and the remaining 11 minutes with a wooden spoon propping the oven door open a bit.
let cool completely before filling.
ingredients | butterscotch buttercream
butter 1/2 cup
powdered sugar 2 cups
butterscotchextract 1/4 tsp
salt 1/4 tsp
heavy cream 1 tbsp
gel food coloring* 4 drops (optional)
method | butterscotch buttercream
in the bowl of a standing mixer, fitted with the paddle attachment, cream the butter until creamy.
add in the powdered sugar and mix on the "stir" setting until incorporated, then up the speed to about 6 for about a minute.
add in the butterscotch extract, salt, and cream, and whip on high until creamy. if the mixture is feeling too thick, you can add a bit of extra cream at a time until you reach the desired consistency.
add in a few drops of gel food coloring to reach your desired color. we were going for a coppery-gold color, so we added in some brown, yellow, and orange.
spread or pipe buttercream on your shells and sandwich together.
refrigerate these guys when you're done. they actually taste better after a day of refrigeration than they do right after baking.
tip: the sizes of all of your shells will tend to be slightly different, so make sure you buddy up your shells to similarly sized partners so that the entire cookie is a consistent size.
extras | chocolate snitch wings
to create the wings, we just melted semisweet chocolate chips and piped them out onto parchment paper using small tip attachments.
we then froze them until we were ready to put them inside the cookies.
the wings don't last long at room temperature, so if you'd like to serve these up with wings, they should be kept in the fridge as long as possible. or, you can take cute pictures with the wings and then just eat them on their own. ;)